Creating a form or survey
A form or survey in Xanti is a folder with questions. Each question is a separate item in that folder. This is how you make a new form and put it on your website.
Creating the folder
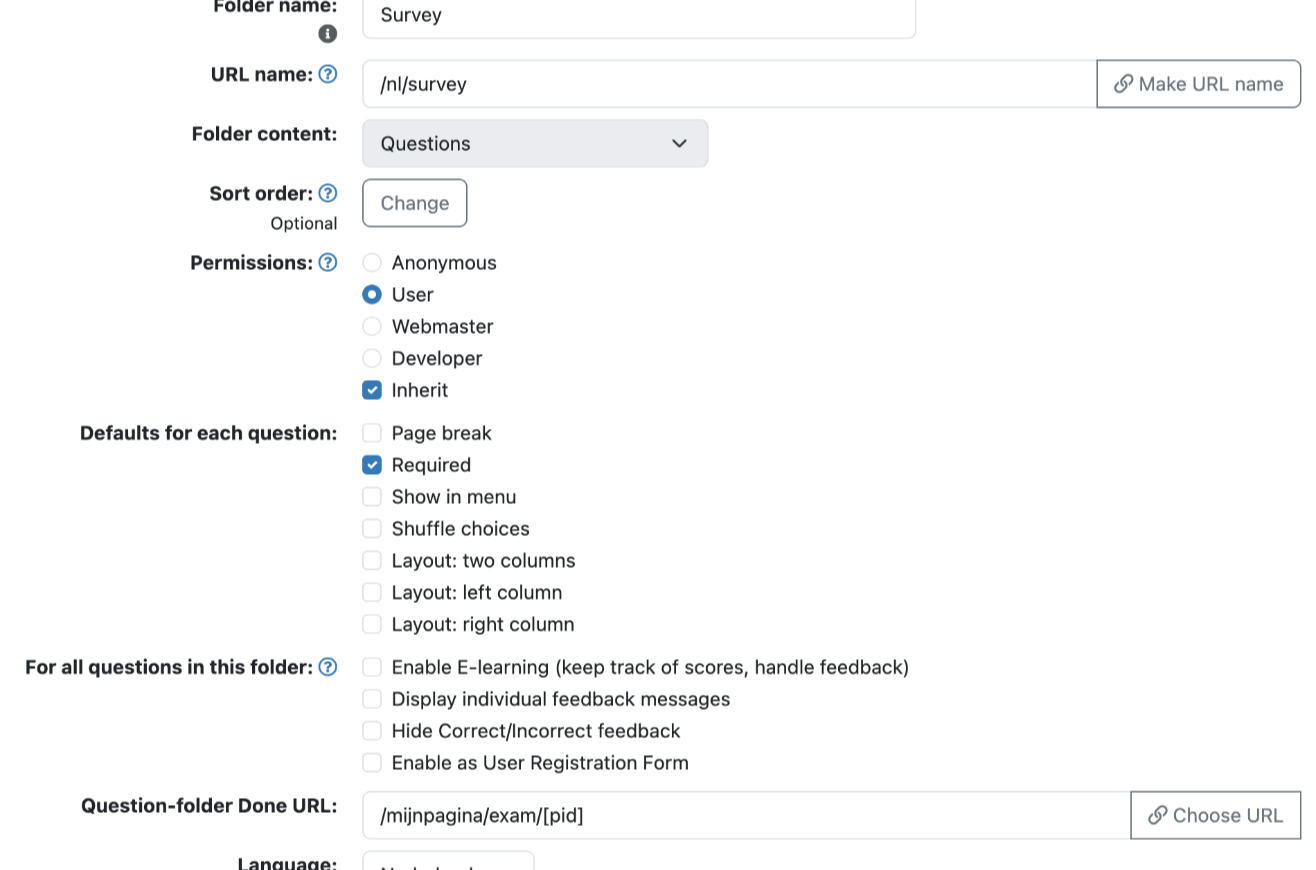
- In the admin, go to the place where you want to keep the form and click New Folder.
- Under Folder name, enter the name of the form, for example Contact form.
- Under Folder content, choose Questions. Only then do the form settings appear.
- Under Permissions, choose who may fill in the form. For a form that every visitor may fill in, choose Anonymous.
- Under Defaults for each question, tick what should apply to most questions, for example Required. Every new question gets these settings; you can still change them per question.
- Under Question-folder Done URL, use Choose URL to pick the page the visitor sees after sending, for example a page Thank you for your message. Create that page first as a normal page.
- Do you want a text above the form? Click Intro text and type the text.
- Click Save.
Adding questions
- Open the folder and click Add Question.
- Under Type, choose the kind of question, for example Short reply for a short text field. See the page Question types and settings.
- Under Question, type the question as the visitor sees it, for example Your name.
- Click Save & Add New to create the next question right away, or Save when you are done.
- If you like, add a button as the last question, with the type Submit Button. Under Button text, type the text on the button, for example Send.
With More > View (under the heading Questions) you see all questions of the form one below the other.
Putting the form on the website
Create a menu item or a link in a text to the form. In the URL chooser (Choose URL), choose the folder of the form.
Always test the form yourself before you announce it: fill it in as a visitor and check that the thank-you page and the e-mail arrive correctly.
See also
- Question types and settings
- Receiving answers by e-mail
- Viewing and exporting results
Checked: November 2026