Creating a mailing
With a mailing you send one e-mail, such as a newsletter, to a whole group of users at once. First you create the message. You send it afterwards (see Testing and sending a mailing).
- In the admin, open the folder with your mailings.
- Click Add Mailing message.
- Under Subject, enter the subject line of the e-mail. This field is required.
- Under Date, choose the date shown in the mailing.
- Under Template, choose the layout of the e-mail, for example HTML or HTML + unsubscribe. The template also sets the sender. Which fields you see next depends on the template:
- HTML-version and/or Text-version: this is where you type the text of the e-mail.
- Folder: for a template that uses a folder, click Choose Folder. The articles or news items in that folder then make up the content of the mailing.
- Do you want the recipient's name in the text? Below the text box, under Insert Field, choose for example Name or Letter Salutation. Each recipient then sees their own details.
- Under Settings, turn on the options you want to use (see the tip below).
- Click Save.
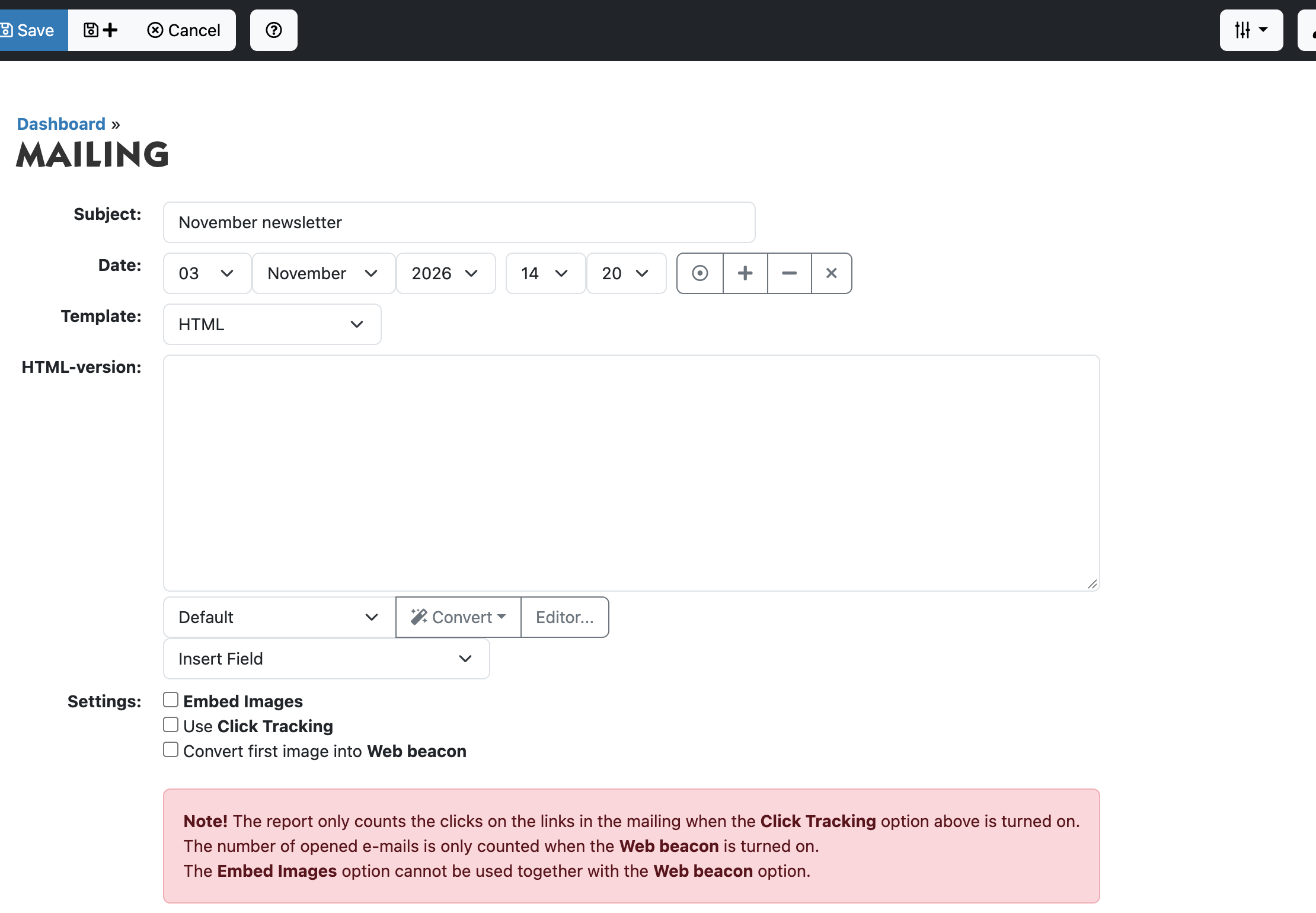
Do you want to see later how many people opened the mailing and clicked links? Then turn on the options for Click Tracking (clicks on links) and Web beacon (opened e-mails) under Settings before you send. The Embed Images option cannot be used together with Web beacon.
After saving, you see the mailing as it will be sent, with the sender, the template and the settings. If something is wrong, for example when no template or folder was chosen, it is shown in red. Under Attachments you can add files that go along with the e-mail.
Want to use a previous mailing as a starting point? Open that mailing and click Duplicate. Then change the subject and the text.
See also
- Testing and sending a mailing
- Recipients: groups, subscribing and unsubscribing
- Mailing statistics
Checked: November 2026